AstroPy: Astrophysics using Python
Introduction
Astrophysics, one of the most advanced and intriguing fields in science, brings together brilliant minds and high performance computing to transform enormous amount of raw data into human comprehensible information that expands our knowledge about the known Universe.
Python, a widely-used, easy-to-understand, language is often used for data science and analytics. It has several libraries that could be beneficial in knowledge discovery in Astrophysics. I will be discussing one such library, called AstroPy.
AstroPy is a community-driven, open-source library that offers a wide range of core functionalities for astronomy. It supports various file formats, including Flexible Image Transport System (FITS) files, Virtual Observatory (VO) tables, common ASCII table formats, and provides tools for handling physical constants, units, celestial coordinates, and time calculations. Getting to know this versatile package is a must for anyone exploring astronomy and astrophysics through Python. Designed to streamline common astronomical tasks, AstroPy ensures standardized data structures for efficient analysis.
AstroPy is also widely used in academic and research settings, making it a bridge between coding and real-world astrophysical challenges. Whether you're working with complex datasets or visualizing celestial coordinates, this library empowers researchers to focus on science rather than technicalities.
For data science students branching into astrophysics, AstroPy serves as a user-friendly gateway into this fascinating field. Learn more about its extensive features through the AstroPy Documentation or consider joining its active community to contribute.
Installation
You can install AstroPy by inserting the following command in your Python terminal:
python.exe -m pip install astropy
Make sure you have properly set up your python environment. You can try installing it directly through popular IDEs like PyCharm or VSCode.
Getting to Know AstroPy
AstroPy enables seamless unit conversion for various calculations. In this example, I demonstrate how to calculate the speed of light between the Sun and Earth in both light-years per second and kilometers per second, effortlessly converting between units.
from astropy import units
#Calculating speed of light between the Sun and Earth
#during Winter Solstice (December 21)
distanceSE = 147090000 * units.km
distanceSELy = distanceSE.to(units.lightyear) #Converting to LightYear
time = 497 * units.s #Time in Seconds
speed = distanceSELy / time
print("Speed of Light between Sun and Earth (LightYear/Sec) = {:.10f}".format(speed))
print("Speed of Light between Sun and Earth (Km/Sec) = {:.4f}".format(speed.to(units.km/units.s)))
Output:
Speed of Light between Sun and Earth (LightYear/Sec) = 0.0000000313 lyr / s
Speed of Light between Sun and Earth (Km/Sec) = 295955.7344 km / s
AstroPy can also handle astronomical coordinates. In Layman's term, Right Acension(ra) is the celestial longitude and Declination(dec) is the celestial latitude.
The Coordinates module in AstroPy helps in working with the celestial coordinate system.
from astropy.coordinates import get_sun
from astropy.time import Time
my_time = Time.now() #Current Time
print(get_sun(my_time)) #Coordinates of Sun in Right Acension, Declination, and Distance in AU
print(get_sun(my_time).to_string(style='hmsdms')) #Coordinates of Sun in Hours-Minute-Second Format
Output:
SkyCoord (GCRS: obstime=2024-12-28 03:15:20.792177, obsgeoloc=(0., 0., 0.) m, obsgeovel=(0., 0., 0.) m / s): (ra, dec, distance) in (deg, deg, AU)
(277.10557264, -23.27546755, 0.98343585)
18h28m25.33743467s -23d16m31.68318593s
I have two outputs, one is in the degree format whereas the other is in hmsdms format. hmsdms is a widely used format in the astronomy community, where
| Right Ascension (ra) | Declination (dec) |
|---|---|
| H: Hours | D: Degrees |
| M: Minutes | M: Minutes |
| S: Seconds | S: Seconds |
Hence, the Sun at the time of writing this is located at "18 Hours 28 Minutes 25.33 Seconds" ra and "-23 Degrees 16 Minutes 31.68 Seconds" dec.
AstroPy is also capable of processing FITS files. Flexible Image Transport System (FITS) are essentially scientific data files composed of multi-dimensional arrays and 2-D tables. They are widely used within astronomy to transport, analyse and archive files.
I am using a FITS file that I acquired from a dataset on Kaggle to show how AstroPy can easily process these files and plot it using the Matplotlib package.
from astropy.io import fits
import matplotlib.pyplot as plt
hdulist = fits.open("BlogExample.FTZ") #Opening the FITS file
hdulist.info() #Printing the meta data of the FITS file
data = hdulist[0].data
print(data.shape) Printing the shape of the data
hdulist.close()
#Plotting the data
plt.figure(figsize=(8, 8))
plt.imshow(data, cmap='gray', origin='lower')
plt.colorbar(label='Pixel Intensity')
plt.title('FITS Image')
plt.xlabel('X Pixels')
plt.ylabel('Y Pixels')
#Saving the image
output_image = 'Image.png'
plt.savefig(output_image)
plt.show()
Output:
Filename: BlogExample.FTZ
| No. | Name | Ver | Type | Cards | Dimensions | Format |
|---|---|---|---|---|---|---|
| 0 | PRIMARY | 1 | PrimaryHDU | 68 | (1046, 1079) | float32 |
| 1 | EXPOSURE | 1 | ImageHDU | 8 | (1046, 1079) | float32 |
| 2 | QUALITY | 1 | ImageHDU | 9 | (1046, 1079) | int16 |
(1079, 1046)
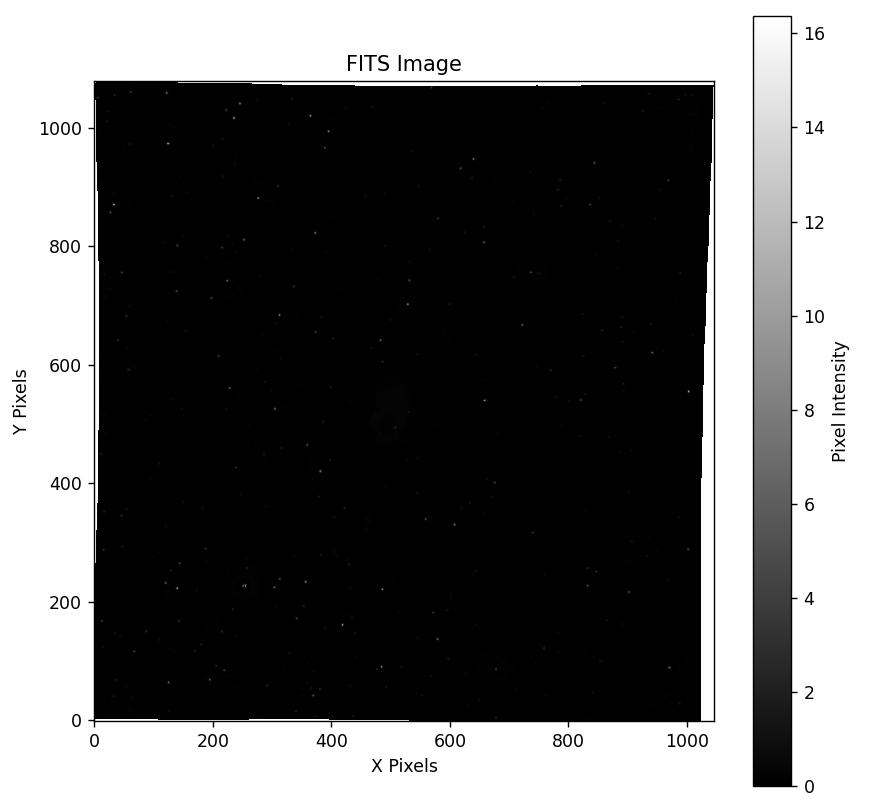
In the output, we have listed out the meta data of the FITS file and the image of the FITS file.
Conclusion
Astropy offers a powerful toolkit to explore the universe computationally. Its flexibility and comprehensiveness make it a valuable resource for data science enthusiasts stepping into astronomy. By mastering its basics, you can unlock countless opportunities for interdisciplinary projects.
As a learning data scientist, this could be your stepping stone to discovering how data-driven approaches revolutionize our understanding of the cosmos. Happy exploring!
© Copyright 2025 | Made by Chirag Jain